
While MultiLipi's AI handles the heavy lifting, maintaining a consistent brand voice requires a human touch. Whether you need to fix a technical term or adjust the tone for a specific market, MultiLipi provides two powerful interfaces to manage your content: the Manual Editor (for bulk updates) and the ビジュアルエディター (for on-page context).
Both methods allow you to edit, refine, and publish changes instantly to your live site.
Why Manual Editing Matters
Refining AI translations helps maintain brand consistency, fix technical terminology, optimize local SEO keywords, and ensure cultural relevance across markets.
Method 1: The Manual Editor (Bulk Management)
Best for: Rapidly reviewing text lists, fixing terminology, and optimizing SEO keywords.
The Manual Editor offers a streamlined, side-by-side view of your source and translated text, making it easy to audit content efficiently.
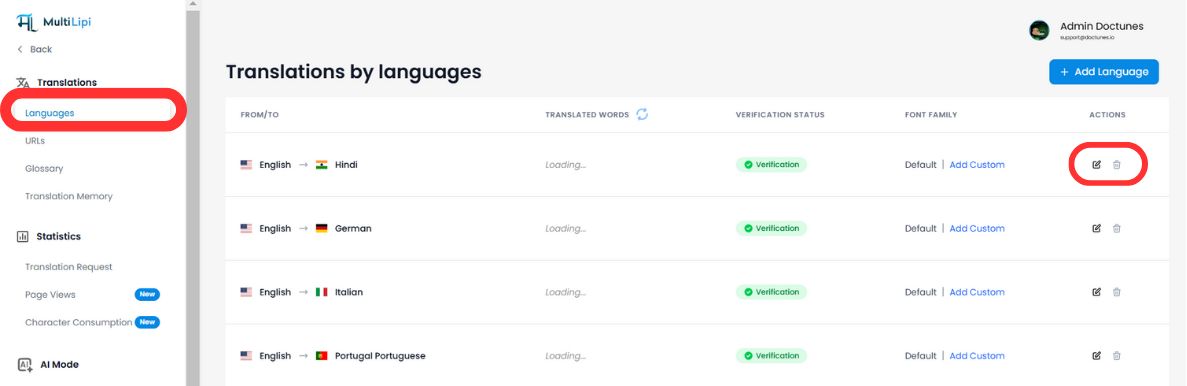
Step 1: Access Project Dashboard
Log in to your MultiLipi dashboard and click Projects on the sidebar. Select the specific domain you wish to manage.
Step 2: Select Target Language
Choose the language you want to edit (e.g., "French"). The system will load a complete list of all text strings found on your site alongside their current translations.
Step 3: Edit Content
Click inside any translation box to modify the text. You can use the top search bar to instantly find specific phrases, product names, or headlines that need attention.
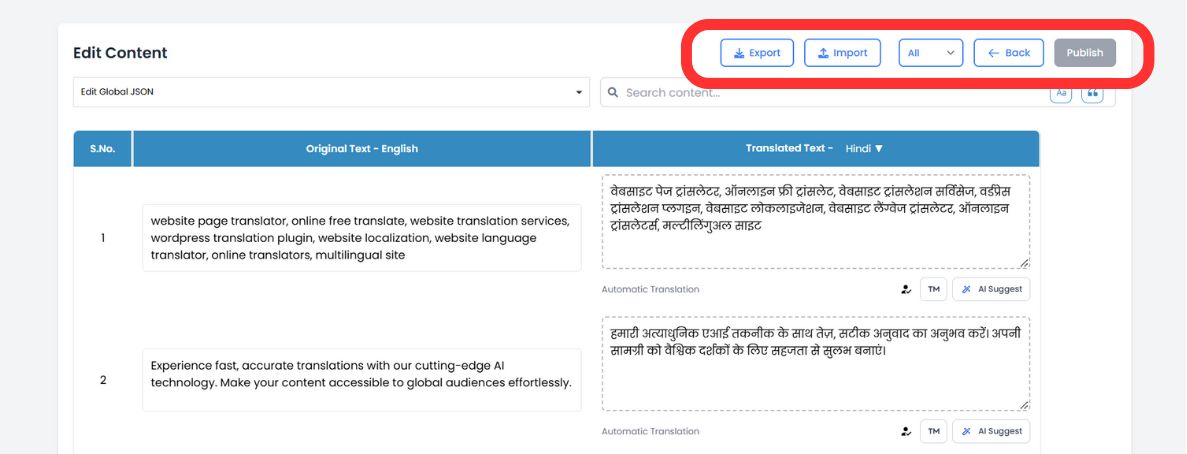
Step 4: Leverage AI Suggestions (New)
As you edit, our AI engine now analyzes your text in real-time. Look below each field for Smart Suggestions tailored to improve readability and SEO performance.
One-Click Replace
If the AI suggests a better phrasing (or matches a term from your Glossary), simply click the suggestion to instantly swap it into the editor field.
Step 5: Publish
Once satisfied, click the Publish button in the top-right corner. Your updates are pushed to the global network immediately.
Method 2: The Visual Editor (In-Context Review)
Best for: UI/UX adjustments, marketing copy, and fixing layout breaks.
Context is everything. The Visual Editor lets you browse your actual website and edit translations directly on the screen, ensuring your text fits perfectly within your design.
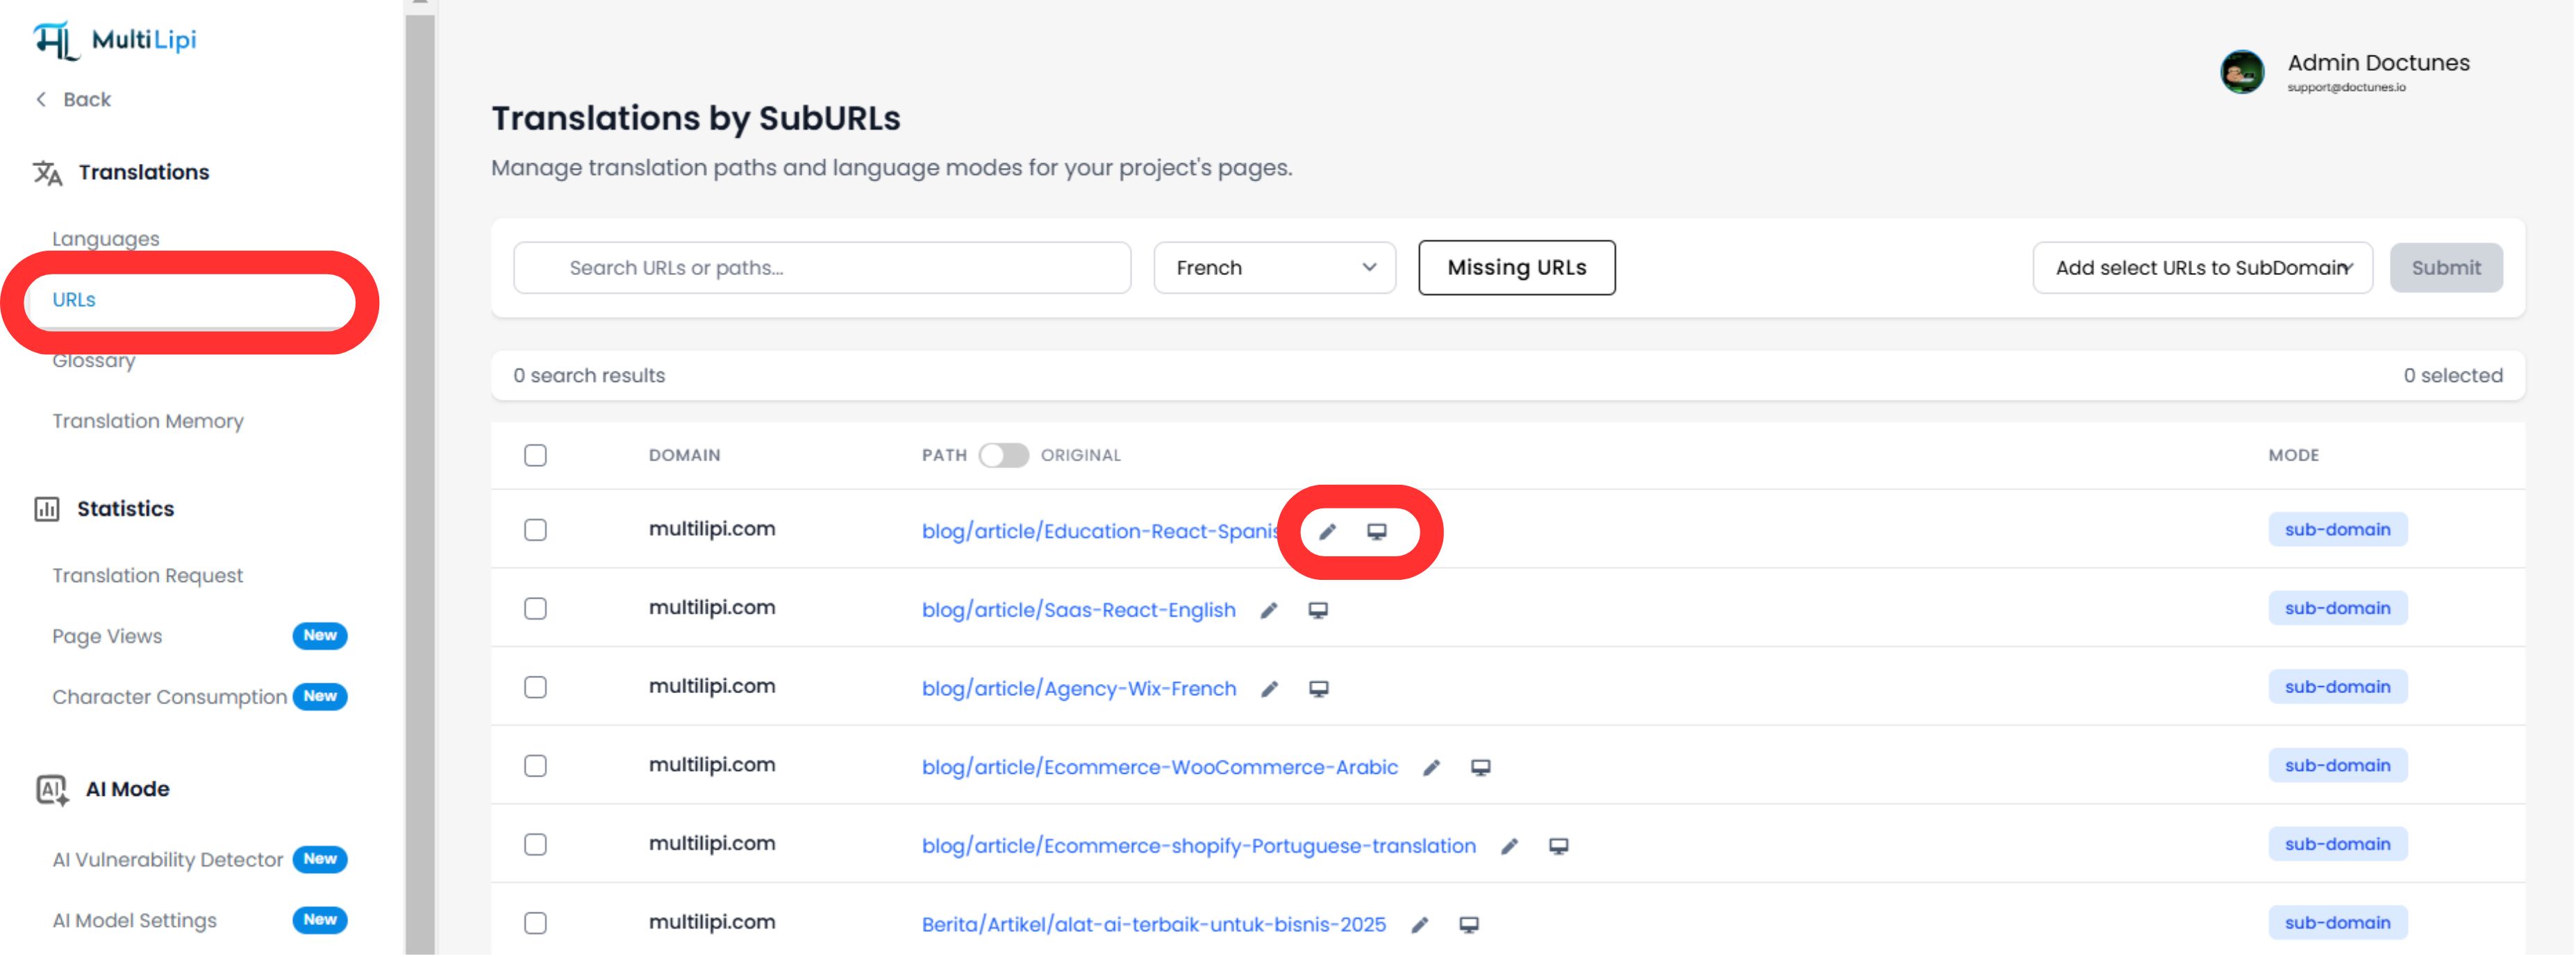
Step 1: Launch the Interface
Navigate to Translations > URLs in the dashboard sidebar. You will see a list of all indexed pages.
Step 2: Open Live View
Click the Visual Editor icon (🖥️) next to the page you want to edit. This opens a live, interactive preview of your site in the selected language.
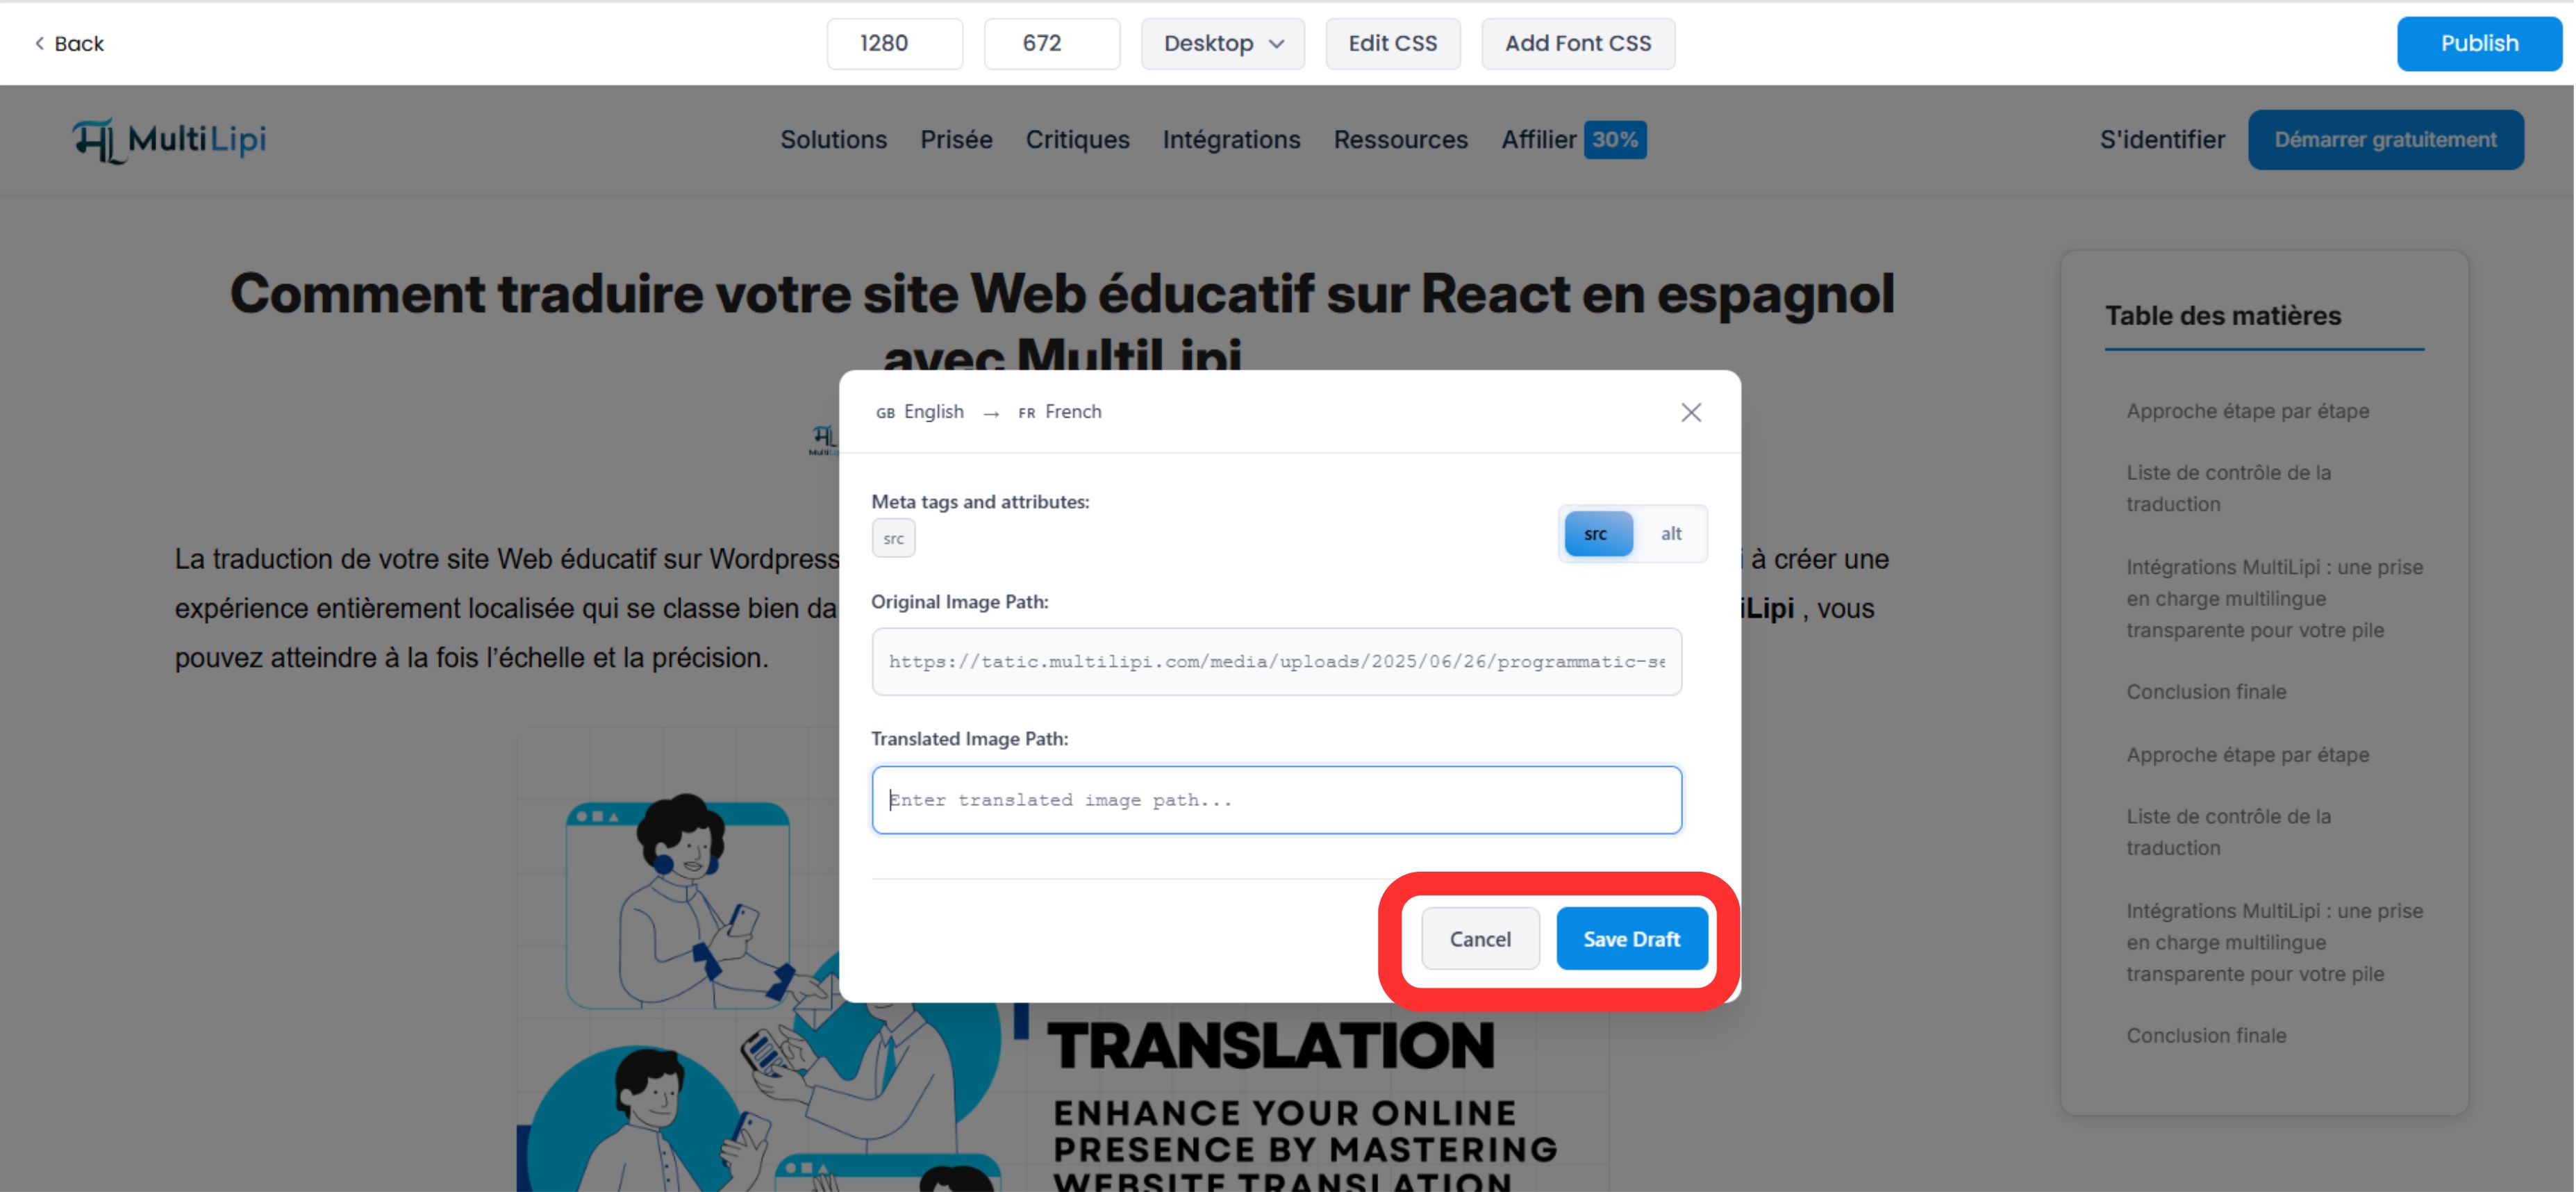
Step 3: Click-to-Edit
Simply click on any text element—headlines, buttons, or paragraphs—to open the inline editor.
Real-Time Layout Check
See immediately if a translation is too long and breaks your design.
Image SEO
Click on images to translate Alt Tags directly, boosting your visibility in Google Images for that region.
Step 4: Apply AI Enhancements
The Visual Editor now includes advanced context tools:
- •Tone Sliders: Adjust the formality (e.g., Professional vs. Friendly) and let the AI rewrite the copy to match.
- •Misalignment Detection: The system automatically flags copy that might look broken or misaligned.
Step 5: Publish
Click Publish to push your changes live. You can switch languages via the top dropdown to repeat the process for other regions without leaving the page.
Why This Matters for Growth
Editing is not just about correcting errors; it is a conversion strategy.
Trust Signals
A grammatical error in a checkout button can kill a sale. A quick manual review ensures your "Money Pages" (Pricing, Checkout) feel native and trustworthy.
SEO Authority
Using the Manual Editor to insert high-volume local keywords (e.g., changing "Cell Phone" to "Handy" for Germany) can significantly improve your local search rankings.
💡 プロのヒント: Combine both editors in your workflow. Use the Manual Editor for bulk terminology fixes and SEO optimization, then switch to the Visual Editor to verify that changes look perfect within your actual design layout.