

バックエンドコードなしでビジュアル開発をグローバルに展開しましょう。
Webflowはビジュアル開発の主要プラットフォームですが、ネイティブのローカライズは複雑で高価になる可能性があります。MultiLipiは、単一のスクリプトインジェクションを介してWebflowのアーキテクチャに直接統合され、静的なページとCMSコレクションを瞬時にグローバルSEOインデックス付きの 多言語インフラストラクチャ でグローバルSEOインデックス付きのプラットフォームに変換します。
このガイドでは、Webflowの カスタムコード 機能。
1. デプロイメントの前提条件
開始する前に、環境が要件を満たしていることを確認してください:
Webflowサイトプラン
あなたは 基本サイトプラン 「カスタムコード」機能をアンロックするには(以上)が必要です。
MultiLipi APIキー
ダッシュボードの以下の箇所にあります 設定 > 一般.
2. ステップ1:サイトアーキテクチャにアクセスする
翻訳エンジンをグローバルヘッダーに挿入して、すべてのページとCMSテンプレートで確実に永続させます。
- 1
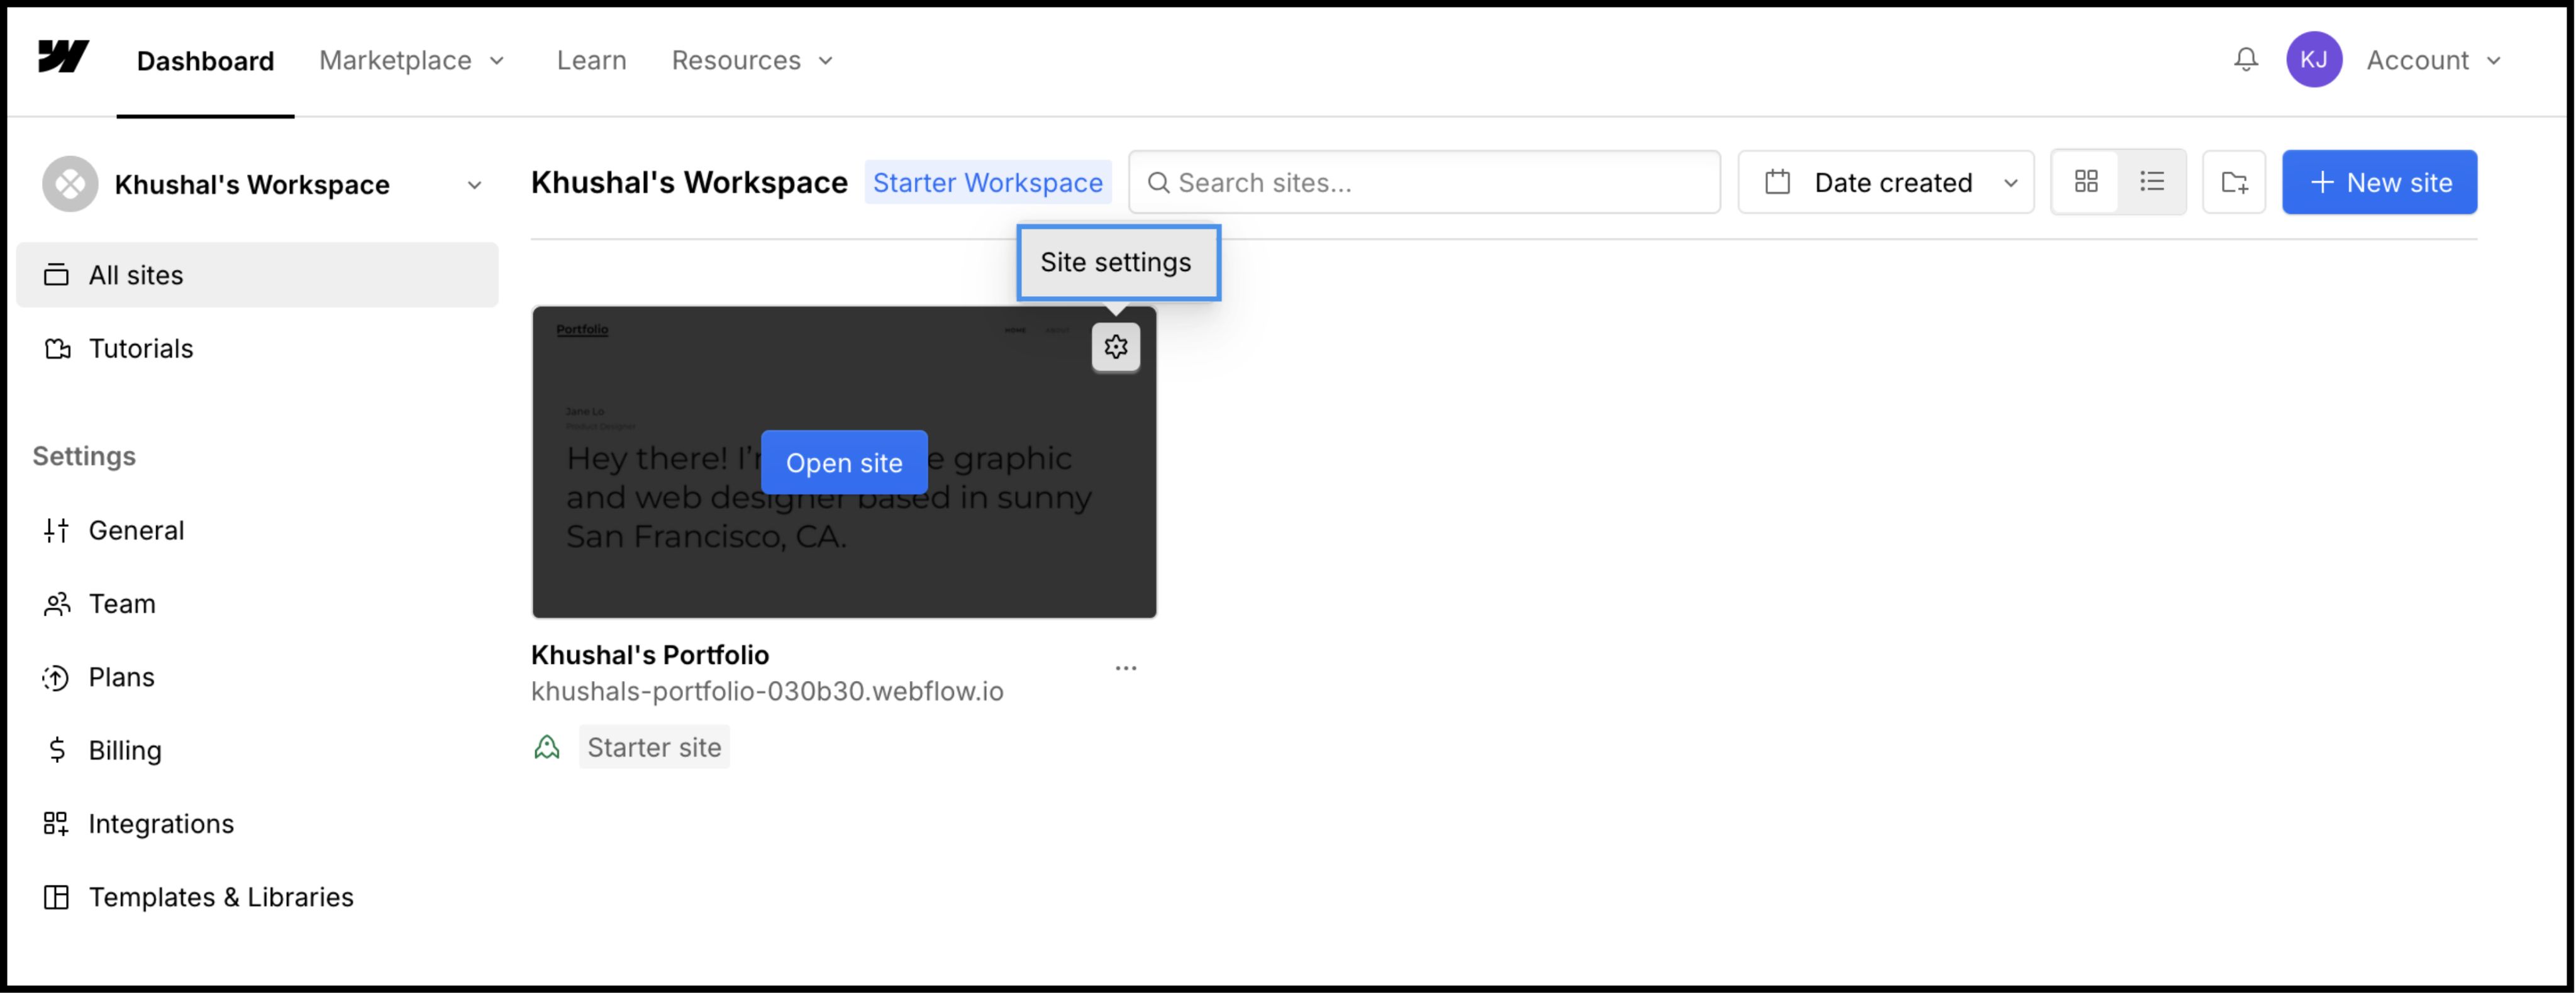
にログインする Webflow ダッシュボード.
- 2
プロジェクトカードを見つけてクリックしてください 設定アイコン(⚙️) (または選択 サイト設定 デザイナーメニューから)。
- 3
に移動します カスタムコード タブをトップナビゲーションバーに表示します。
3. ステップ2: インフラストラクチャースクリプトの挿入
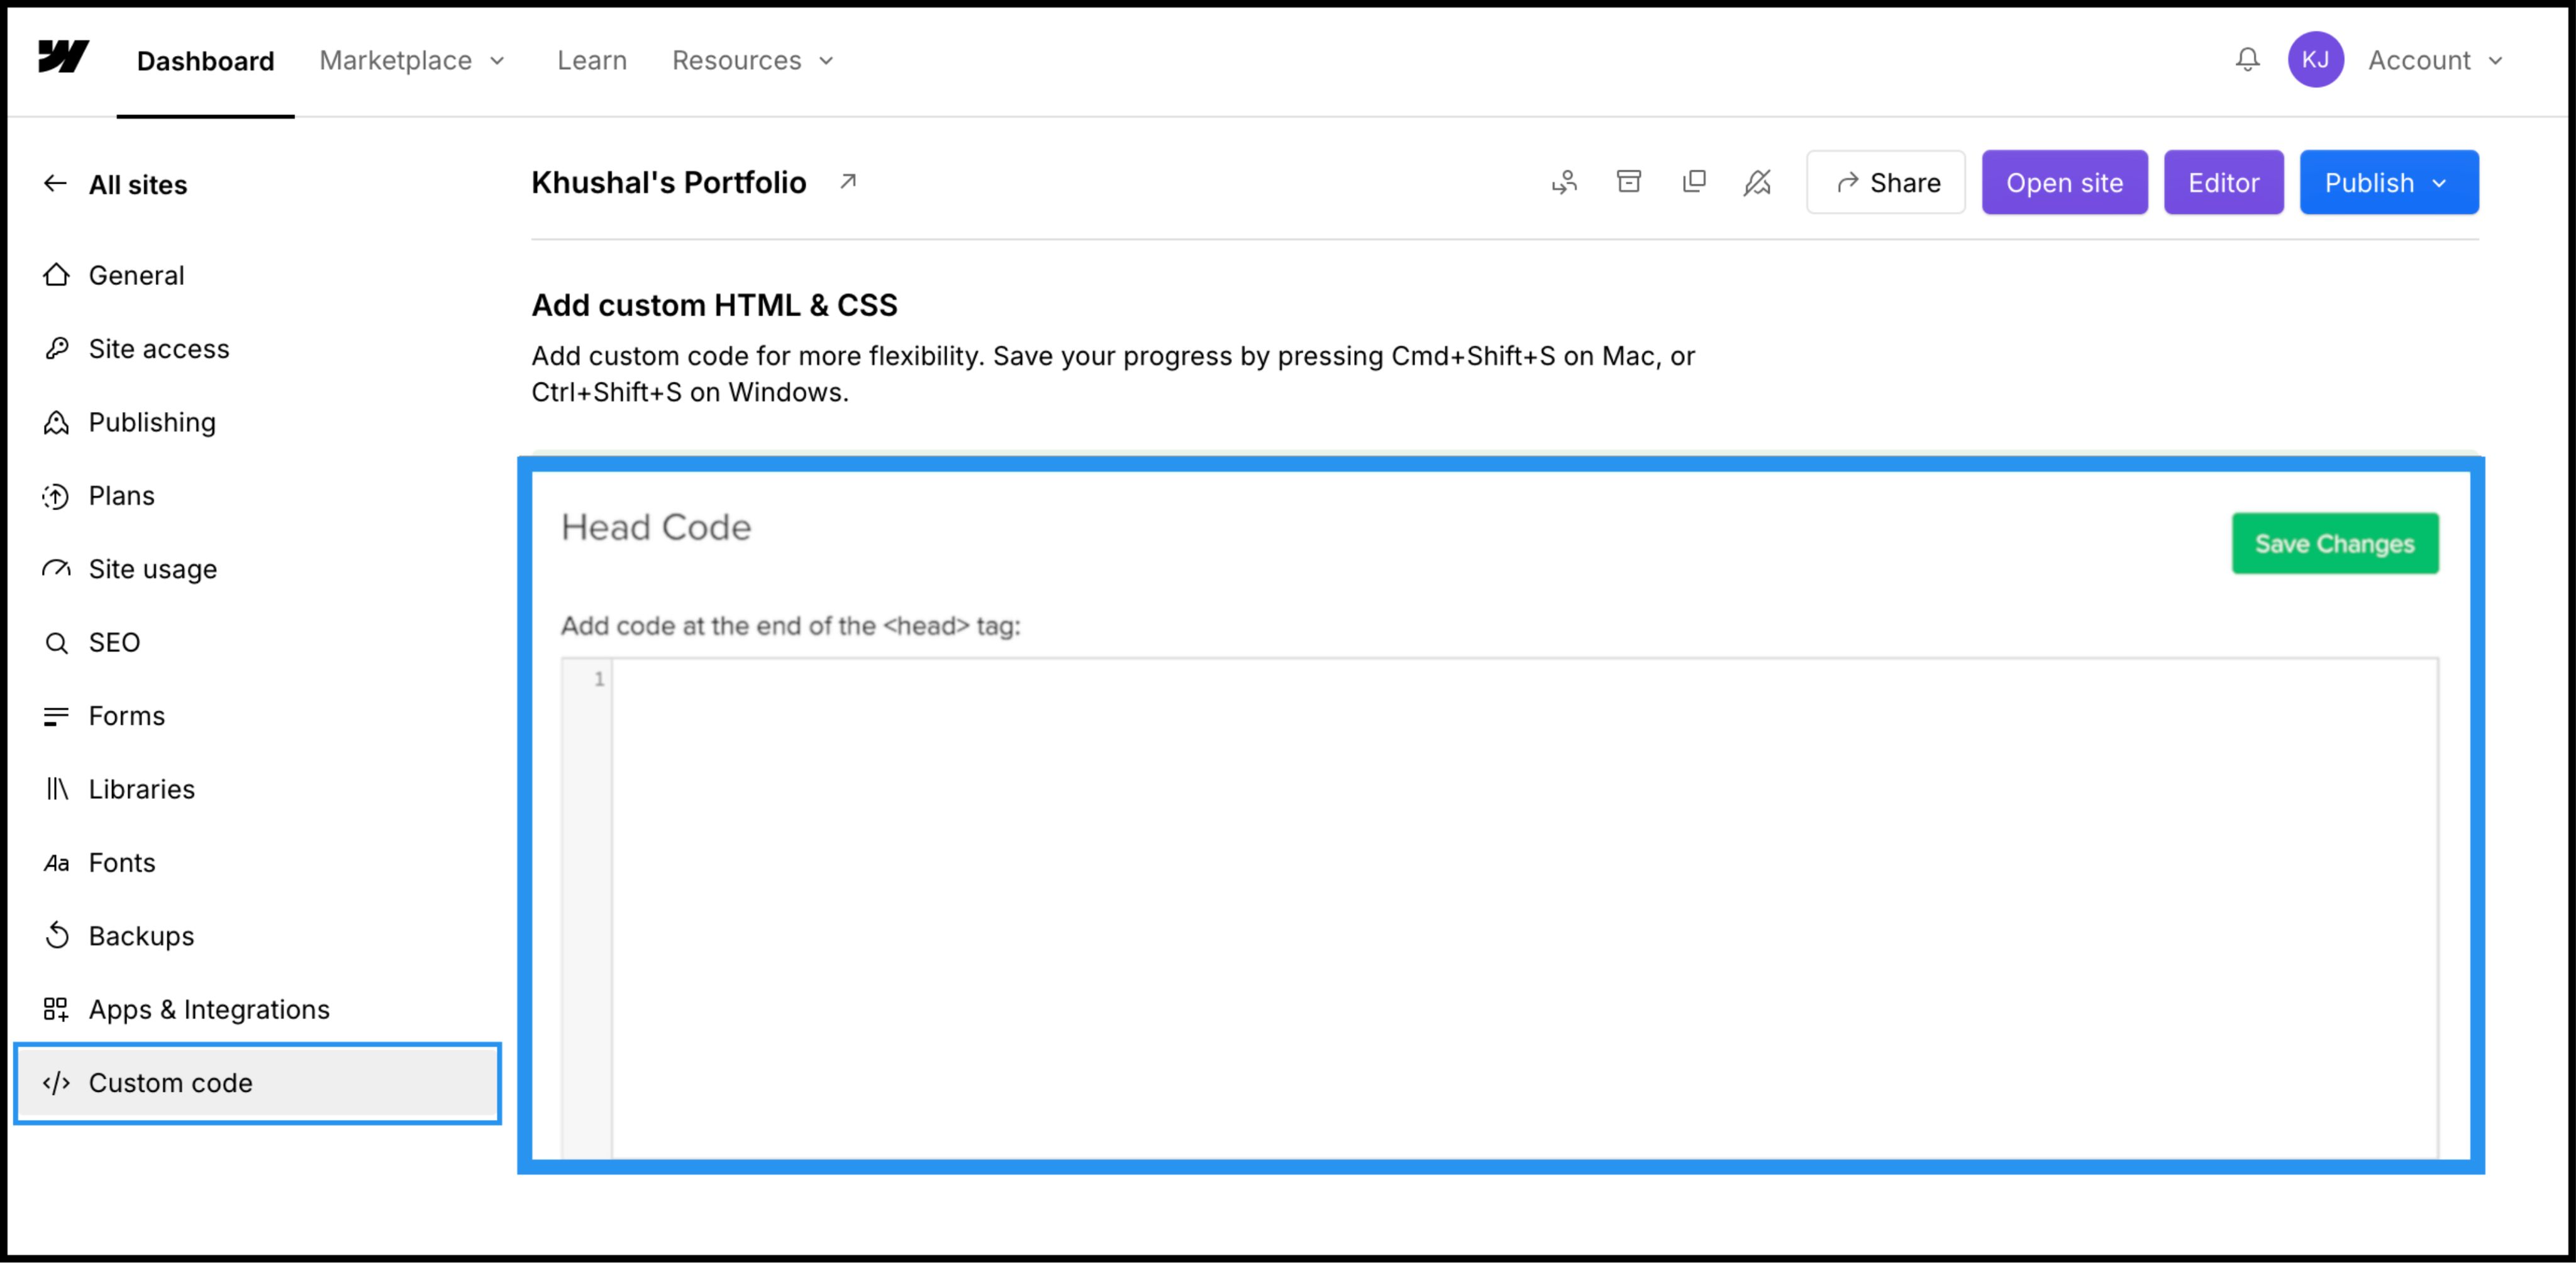
- 1
「」というラベルのフィールドまで下にスクロールします 「ヘッドコード」.
- 2
注意: 「フッターコード」に配置しないでください。翻訳の読み込みが遅延し、「翻訳されていないコンテンツのフラッシュ」が発生する可能性があります。
アクション: 接続スクリプトを貼り付ける
以下の接続スクリプトをフィールドに貼り付けます。
⚠️ クリティカルコンフィグ
- •置換
YOUR_API_KEY_HEREMultiLipiダッシュボードからコピーした実際のAPIキーで。 - •緑色の 変更を保存 右上隅のボタン。
4. ステップ3:デプロイと検証
Webflowはデザイナービューでカスタムコードを実行しません。エンジンを実際に動作させるには、公開する必要があります。
公開
青い 公開 ボタンをクリックし、本番ドメイン(または .webflow.io ステージングドメイン)。
確認
ライブリンクを開きます。
視覚的な確認
言語スイッチャーは左下隅に表示されるはずです。
CMSチェック
CMSコレクションページに移動します(例: /blog/post-1)をクリックして言語を切り替え、動的コンテンツが正しく翻訳されるようにします。
トラブルシューティング プロトコル
- •スイッチャーが見つかりませんか? コードを保存した後、サイトを公開したことを確認してください。
- •プランチェック: Webflowホスティングプランがアクティブであることを確認してください。無料のステージングサイトでは、カスタムドメインでのカスタムコードの実行が制限されることがよくあります。
5. 最適化とスタイリング
デプロイされると、MultiLipiはバックグラウンドでサイレントに動作します。
デザインの整合性
テキストノードのみをスワップするため、Webflowのインタラクション(IX2)やスクロールアニメーションは完全にそのまま維持されます。
スイッチャーのカスタマイズ
ダッシュボード設定を使用してスイッチャーを再配置するか、CSSをオーバーライドしてサイト固有のタイポグラフィに合わせることができます。
SEO自動化
自動的に生成されます sitemap.xml エントリーと hreflang Webflowプロジェクトのタグ。手動でのSEO作業なしでグローバル検索結果にランクインすることを保証します。